In his Drupal 4 Gov webinar Using tools and Git workflow best practices to simplify your local development, Tag1 Senior Infrastructure Engineer Greg Lund-Chaix talks about some of the ways that teams struggle when they become successful and need to learn to scale. One of his primary focuses for teams is helping them learn how to improve their development workflow.
Local development environments give developers the tools to quickly prototype and run their code, and make testing and debugging easier. You can use local environments to create code that can be pushed to the repository, and shared with the team easily and cleanly - enabling discussions and peer review early in the development process.
One of Greg’s key tenets is “No editing on the servers.” Working locally keeps mistakes from reaching the primary codebase. Using a local environment is a best practice.
Tag1 developers often use these two tools:
- DDEV: https://www.ddev.com
- Lando: https://lando.dev
These tools are open source, extensible, and have many available integrations. They make it quicker and easier to create a local environment than using a tool like MAMP, or configuring your own setup with MySQL, Apache, and so on.
Tools like DDEV and Lando also ensure your local environment matches your production environment, preventing long troubleshooting sessions when something works locally, but not on production.
How to get up and running with DDEV
Here’s a quick guide to getting started with DDEV.
- Install DDEV.
- From a command line, start with a basic Composer-ized installation of Drupal. Greg created a template repository you can use as a starting point. You can have as little as a directory for custom code, the
composer.jsonfile, and aREADME.txtfile. - Enter
composer install. Composer will download and complete a basic Drupal installation. - At the prompt, enter
ddev config. - The command prompt updates. DDEV checks the directory name, and assumes the project name is based on that directory. Update the name here if that is incorrect, or press the Enter key to accept the default.
- DDEV checks the contents of the directory. If you’ve installed Drupal, it recognizes the installation. You may also select a different Project Type from the list DDEV supplies.
- DDEV setup is complete. To run DDEV, type
ddev start.
DDEV starts the Docker containers. If you have never run DDEV before, this may take a few minutes while it pulls the containers down from the repository. When ready, a message similar to this displays:

Click, or copy and paste the link into your browser to load your new Drupal website.
Two commands, one Drupal website!
What next?
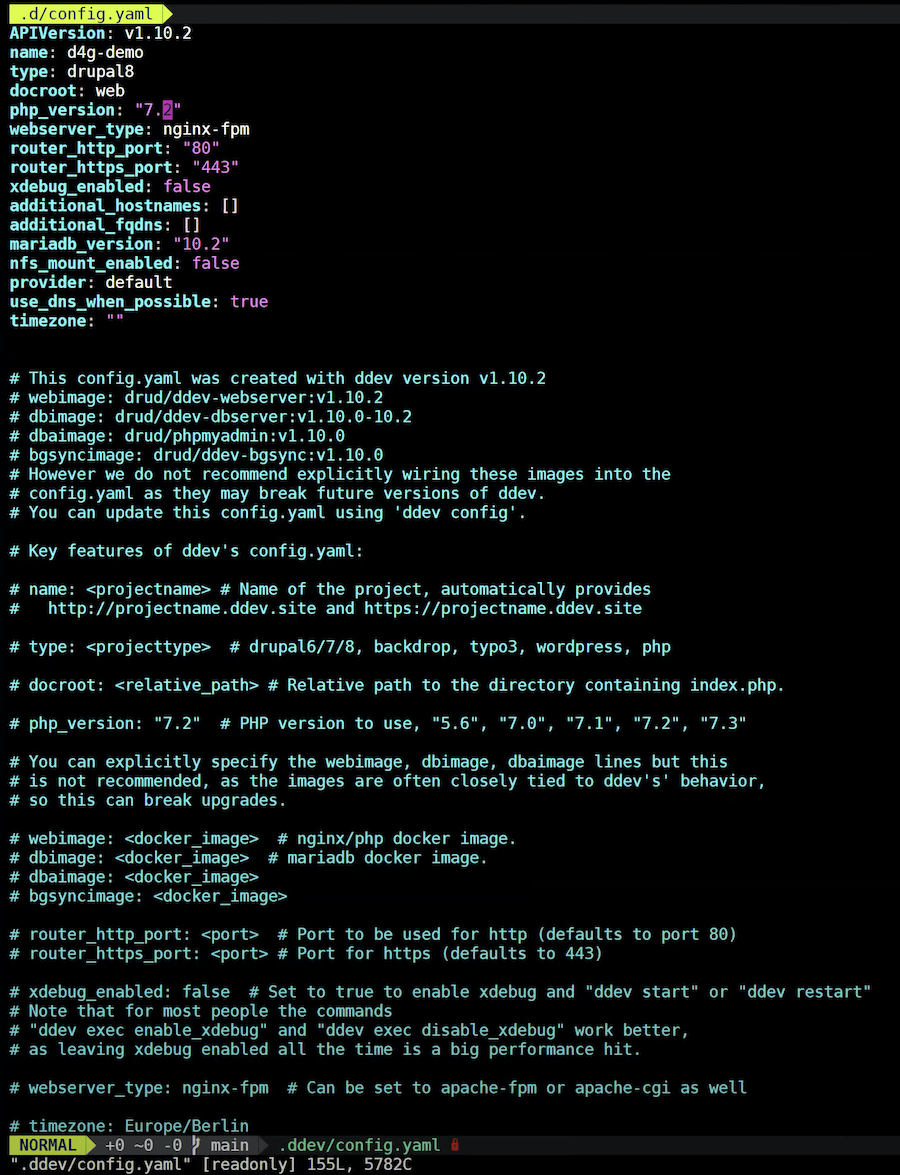
When DDEV runs for the first time, it creates the .ddev/config.yaml file in the directory. Git ignores this file by default; consider adding it to your repository. This ensures everyone who checks out the repository has the same configuration.
View the file in your choice of text viewers.

This file is customizable, enabling you, your developers, and your DevOps teams to make changes that ensure your local environment matches your production servers.
From here, Greg suggests using Ansible, Puppet, or another configuration management tool to deploy your code to production.
Now you should be able to run DDEV, and explore its uses!
About Drupal 4 Gov
Drupal 4 gov is an open source community for developers and IT professionals with an interest in making the government more open to open source. This blog was based on Greg’s Drupal 4 Gov presentation.
It encompasses many open source projects but has its beginnings in the Drupal project.
Drupal 4 gov offers:
- Drupal GovCon - held September 24th - 25th 2020 - virtually
- Gov Summit @ DrupalCon
- Global Training Days/Half Training Days
Photo by Lysander Yuen on Unsplash

