

Introduction
This is the second-part of a series. In the previous entry we used Django 2.0 to build a simple REST API for registering users and managing their logins. To satisfy requirements we managed authentication with client-side sessions, using JSON Web Tokens.
In this blog we’re going to build upon what we started previously by adding two-factor authentication. We’ll learn more about what that means and how it works. We’ll leverage the Django OTP library to fully support TOTP devices, also offering emergency codes for when users lose their phones. And during this process we’ll learn much more about how JSON Web Tokens work, building a custom payload to support a second level of authentication. You can follow along and write out the code yourself, or view it online at the following URL.
- Part I: Powering A Single Page App
- Part II: One-Time Passwords
- Part III: Unit Testing (Coming Soon)
Two-Factor Authentication
Two-factor authentication aims to improve the security of user logins by requiring two methods of proving a user’s identity. In our example, the first method is a password. The second method we’ll use is TOTP.
TOTP
TOTP stands for Time-based One-Time Password. It’s a fairly simple algorithm that involves combining a shared secret key with the current time to generate a verification token that’s only valid for a short amount of time. Fully defined in RFC 6238, our implementation will use a specific subset of the definition supported by Google Authenticator. TOTP depends on your server and whatever client devices your visitors use have properly synchronized clocks. This is generally a safe assumption these days. That said, it would be very easy to expand what you learn here to add support for HOTP (Hashed Message Authentication Code-based One-Time Password), Yubikeys, or Twilio, alternatives also supported by the Django OTP library we’re using.
Installation
The first thing we need to do is to install the Django OTP library in our virtual environment:
(.venv) $ pip install django_otp
Collecting django_otp
  Downloading django_otp-0.4.2-py2.py3-none-any.whl (48kB)
    100% |################################| 51kB 228kB/s
Requirement already satisfied: django>=1.8 in /building-an-api-with-django/.venv/lib/python3.6/site-packages (from django_otp)
Requirement already satisfied: pytz in /building-an-api-with-django/.venv/lib/python3.6/site-packages (from django>=1.8->django_otp)
Installing collected packages: django-otp
Successfully installed django-otp-0.4.2
We then need to add django_otp, django_totp and django_static to our INSTALLED_APPS in ourspa/settings.py. Once done, the entire list now looks as follows:
INSTALLED_APPS = [
    'django.contrib.admin',
    'django.contrib.auth',
    'django.contrib.contenttypes',
    'django.contrib.messages',
    'django.contrib.staticfiles',
    'rest_framework',
    'djoser',
    'django_otp',
    'django_otp.plugins.otp_totp',
    'django_otp.plugins.otp_static',
    'spauser',
]
We’re going to skip the middleware step discussed in the project’s documentation, as it relies on sessions which we're not using.
Finally, we need to run migrations to create two new database tables used by the OTP project:
(.venv) $ python manage.py migrate
Operations to perform:
  Apply all migrations: admin, auth, contenttypes, otp_static, otp_totp, spauser
Running migrations:
  Applying otp_static.0001_initial... OK
  Applying otp_totp.0001_initial... OK
Implementation
With dependencies installed, we can finally implement TOTP support. For this, we’ll create a new Django App called ‘otp’. This will contain all our One-Time Password implementation logic.
(.venv) $ python ./manage.py startapp otp
(.venv) $ ls otp
__init__.py    apps.py        models.py    views.py
admin.py    migrations    tests.py
We then need to enable our new Django app, by adding otp to the end of our INSTALLED_APPS list in ourspa/settings.py:
INSTALLED_APPS = [
...
    'otp',
]
To begin, we’ll add two APIView classes to otp/views.py. The first is the TOTPCreateView class, which we will use when creating a new TOTP device. It will inherit from the Django RESTt Framework’s APIView, and require that the user first be logged in (authenticated). It depends on a simple helper function for determining if the user already has a TOTP device, as our implementation only allows each user to define a single device. This invokes the devices_from_user() helper function from the Django OTP codebase. We have to confirm the device found is a TOTPDevice, as later we will also be introducing StaticDevices. The following only shows the specific code we've just described, scroll down to the end of this section to see the entire file.
def get_user_totp_device(self, user, confirmed=None):
    devices = devices_for_user(user, confirmed=confirmed)
    for device in devices:
        if isinstance(device, TOTPDevice):
            return device
The main function, get(), is for responding to HTTP GET requests. In this function, if the user has already created a TOTP device we load it, or we create a new one. This is ultimately about generating and sharing a secret key that the server and the remote user will both retain. We do this by invoking config_url in the Django OTP’s TOTP plugin to generate a Google Authenticator compatible URI.
Note: When creating a new TOTP device we consider it unconfirmed until the user later uses it to validate a TOTP token, proving they have the secret key. The idea is to prevent locking a user out of their account if they generate a secret key but fail to set it up correctly.
    def get(self, request, format=None):
        user = request.user
        device = get_device(self, user)
        if not device:
            device = user.totpdevice_set.create(confirmed=False)
        url = device.config_url
        return Response(url, status=status.HTTP_201_CREATED)
The second APIVIew class we descriptively name TOTPVerifyView, as it will be used to verify TOTP tokens. This URL will accept an HTTP POST, testing whether or not the received integer token matches one created by the server. If it matches, we identify that the device has been confirmed. The actual brains of this view are implemented by the verify_token function provided by the TOTP module:
class TOTPVerifyView(views.APIView):
    """
    Use this endpoint to verify/enable a TOTP device
    """
    permission_classes = [permissions.IsAuthenticated]

    def post(self, request, token, format=None):
        user = request.user
        device = get_user_totp_device(self, user)
        if not device == None and device.verify_token(token):
            if not device.confirmed:
                device.confirmed = True
                device.save()
            return Response(True, status=status.HTTP_201_CREATED)
        return Response(status=status.HTTP_400_BAD_REQUEST)
When you put it altogether and include all necessary imports, the otp/views.py code looks as follows:
from rest_framework import views, permissions
from rest_framework.response import Response
from rest_framework import status
from django_otp import devices_for_user
from django_otp.plugins.otp_totp.models import TOTPDevice


def get_user_totp_device(self, user, confirmed=None):
    devices = devices_for_user(user, confirmed=confirmed)
    for device in devices:
        if isinstance(device, TOTPDevice):
            return device

class TOTPCreateView(views.APIView):
    """
    Use this endpoint to set up a new TOTP device
    """
    permission_classes = [permissions.IsAuthenticated]

    def get(self, request, format=None):
        user = request.user
        device = get_user_totp_device(self, user)
        if not device:
            device = user.totpdevice_set.create(confirmed=False)
        url = device.config_url
        return Response(url, status=status.HTTP_201_CREATED)

class TOTPVerifyView(views.APIView):
    """
    Use this endpoint to verify/enable a TOTP device
    """
    permission_classes = [permissions.IsAuthenticated]

    def post(self, request, token, format=None):
        user = request.user
        device = get_user_totp_device(self, user)
        if not device == None and device.verify_token(token):
            if not device.confirmed:
                device.confirmed = True
                device.save()
            return Response(True, status=status.HTTP_201_CREATED)
        return Response(status=status.HTTP_400_BAD_REQUEST)
In order to use these new views, we need to add routes. First, we create otp/urls.py and define the following:
from django.urls import re_path
from . import views


urlpatterns = [
    re_path(r'^totp/create/$', views.TOTPCreateView.as_view(), name='totp-create'),
    re_path(r'^totp/login/(?P<token>[0-9]{6})/$', views.TOTPVerifyView.as_view(), name='totp-login'),
]
And finally, we need to include them from ourspa/urls.py. We add a second entry to the urlpatterns list, so it now looks as follows:
urlpatterns = [
    re_path(r'^api/', include('spauser.urls')),
    re_path(r'^api/', include('otp.urls')),
]
Manual Testing
With these files complete, it’s now possible to register an OTP device. We have to first log in, and then we use the JWT to register our OTP device:
Note: If you've left python managpy runserver the entire time, you'll get a 404 error. The development server detects changes in existing files, but it doesn't detect new files. Press ctrl-c then re-run it, and try again.
# log in with my username and password
$ curl -X POST 127.0.0.1:8000/api/user/login/ --data 'email=me@example.com&password=mysecret'
{"token":"eyJ0eXAiOiJKV1QiLCJhbGciOiJIUzI1NiJ9.eyJ1c2VyX2lkIjoxLCJ1c2VybmFtZSI6Im1lQGV4YW1wbGUuY29tIiwiZXhwIjoxNTE1MTg5Njg2LCJlbWFpbCI6Im1lQGV4YW1wbGUuY29tIn0.cJZJhs5SS2ZLPiIwrRGq43C9HZuMXSOWG9UuUcUHUgo"}
# create a TOTP device
$ curl 127.0.0.1:8000/api/totp/create/ -H 'Authorization: JWT eyJ0eXAiOiJKV1QiLCJhbGciOiJIUzI1NiJ9.eyJ1c2VyX2lkIjoxLCJ1c2VybmFtZSI6Im1lQGV4YW1wbGUuY29tIiwiZXhwIjoxNTE1MTg5Njg2LCJlbWFpbCI6Im1lQGV4YW1wbGUuY29tIn0.cJZJhs5SS2ZLPiIwrRGq43C9HZuMXSOWG9UuUcUHUgo'
"otpauth://totp/me%40example.com?secret=PVL4IQMTVIOJWDNAED6ZSSAL2NKS2MV4&algorithm=SHA1&digits=6&period=30"
The otpauth:// URI that is returned can be used to generate a QR code in your Single Page App. If preferred, it’s also possible to do this on the backend, and to instead send a QR image to the front end, but either way we’re going to leave this as an exercise to the reader. Regardless, the secret can be manually entered into a tool such as Google Authenticator to test out token verification. In the above example, our secret key is PVL4IQMTVIOJWDNAED6ZSSAL2NKS2MV4. One way to test this is to manually add this secret key into a 1Password OTP field, and then use the tokens it generates every 30 seconds.
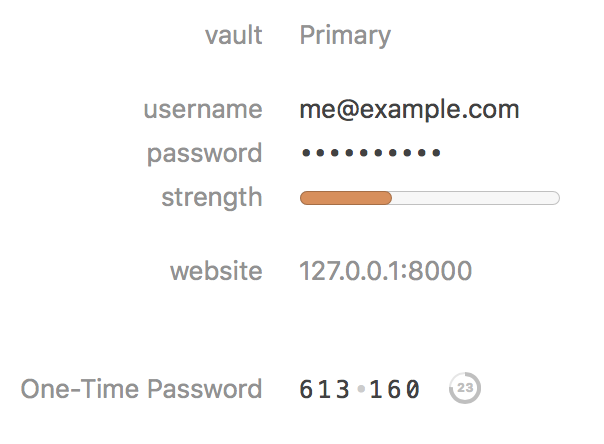
We’re then able to perform our second login, using our TOTP token. In our example, the token value was 613160:
curl -X POST 127.0.0.1:8000/api/totp/login/613160/ -H 'Authorization: JWT eyJ0eXAiOiJKV1QiLCJhbGciOiJIUzI1NiJ9.eyJ1c2VyX2lkIjoxLCJ1c2VybmFtZSI6Im1lQGV4YW1wbGUuY29tIiwiZXhwIjoxNTE1MTg5Njg2LCJlbWFpbCI6Im1lQGV4YW1wbGUuY29tIn0.cJZJhs5SS2ZLPiIwrRGq43C9HZuMXSOWG9UuUcUHUgo'
true
JWT Session
The Django OTP project considers three levels of authentication: Anonymous, Authenticated, and Authenticated+Verified. Our previous step is how an authenticated user gets verified, proving that they’re in possession of the private key they obtained when setting up their account. Unfortunately, the way the project enforces access based on these three levels of authentication utilizes Django sessions, something we don’t have in our REST implementation. We’re going to have to get a little creative to solve this with our JSON Web Token implementation.
The Structure of a JSON Web Token
The JWT we’re passing around for authentication is comprised of three pieces. In our examples, these pieces are separated by periods. The first piece is the header, and this specifies what kind of token it is and what algorithm is being used. The second piece is the payload, which carries arbitrary data. The third and final piece is the signature, and this is how we know that the JWT remains unmodified since creation.
JWT tokens are signed, not encrypted, so you can easily extract the contents by pasting the entire token into a tool such as the one found on this web page. Using the token from our previous example, eyJ0eXAiOiJKV1QiLCJhbGciOiJIUzI1NiJ9 is our header and expands to:
{
  "typ": "JWT",
  "alg": "HS256"
}
eyJ1c2VyX2lkIjoxLCJ1c2VybmFtZSI6Im1lQGV4YW1wbGUuY29tIiwiZXhwIjoxNTE1MTg5Njg2LCJlbWFpbCI6Im1lQGV4YW1wbGUuY29tIn0 is our payload and expands to:
{
  "user_id": 1,
  "username": "me@example.com",
  "exp": 1515189686,
  "email": "me@example.com"
}
And cJZJhs5SS2ZLPiIwrRGq43C9HZuMXSOWG9UuUcUHUgo is our signature and expands to:
HMACSHA256(
  base64UrlEncode(header) + "." +
  base64UrlEncode(payload),

)
This suggests we can modify the payload, storing whatever we want in it. Specifically, we can mimic what Django OTP is doing with a session, but instead storing this information in a JWT which the Single Page App can then use to prove it has been authenticated and verified.
Custom JWT Payload
The Django Framework JWT Authentication library allows you to create your own JWT payload by setting the JWT_PAYLOAD_HANDLER to point at your own custom implementation. We want to make minimal changes to the existing and working implementation, so we’ll use the project’s default jwt_payload_handler() function as our starting place.
Reviewing that function, we can drop the warning, and we can go ahead and remove the redundant email field. While this change is unnecessary, the less data we put into the payload, the smaller it is. So anything we don’t need in there should be removed as our Single Page App has to pass it to us with every request. All we really need is the email address and user_id which allows us to look the user up in our Django database. To help maintain forward compatibility we’ll continue to refer to the email as our username.
We won’t modify the refresh logic, or the support for JWT audience and issuer. However we will add a new otp_device_id, mimicking Django OTP’s session logic. This will require us to pass in our OTP device when verified. The resulting function we’ll add to a new otp/utils.py file, which reads as follows:
from calendar import timegm
from datetime import datetime
from rest_framework_jwt.compat import get_username, get_username_field
from rest_framework_jwt.settings import api_settings
from django_otp.models import Device


def jwt_otp_payload(user, device = None):
    """
    Optionally include OTP device in JWT payload
    """
    username_field = get_username_field()
    username = get_username(user)

    payload = {
        'user_id': user.pk,
        'username': username,
        'exp': datetime.utcnow() + api_settings.JWT_EXPIRATION_DELTA
    }

    # Include original issued at time for a brand new token,
    # to allow token refresh
    if api_settings.JWT_ALLOW_REFRESH:
        payload['orig_iat'] = timegm(
            datetime.utcnow().utctimetuple()
        )

    if api_settings.JWT_AUDIENCE is not None:
        payload['aud'] = api_settings.JWT_AUDIENCE

    if api_settings.JWT_ISSUER is not None:
        payload['iss'] = api_settings.JWT_ISSUER

    # custom additions
    if (user is not None) and (device is not None) and (device.user_id == user.id) and (device.confirmed is True):
        payload['otp_device_id'] = device.persistent_id
    else:
        payload['otp_device_id'] = None

    return payload
Next, we need to modify ourspa/settings.py, adding JWT_PAYLOAD_HANDLER to our JWT_AUTH configuration dictionary. It needs to point to our modified payload handler, so the resulting section now looks as follows:
JWT_AUTH = {
    'JWT_EXPIRATION_DELTA': datetime.timedelta(minutes=15),
    'JWT_GET_USER_SECRET_KEY': 'spauser.models.jwt_get_secret_key',
    'JWT_PAYLOAD_HANDLER': 'otp.utils.jwt_otp_payload',
}
Finally, let’s confirm this is working by logging in, then using our newly formatted JWT to access a page requiring authentication.
# log in with our username and password
$ curl -X POST 127.0.0.1:8000/api/user/login/ --data 'email=me@example.com&password=mysecret'
{"token":"eyJ0eXAiOiJKV1QiLCJhbGciOiJIUzI1NiJ9.eyJ1c2VybmFtZSI6Im1lQGV4YW1wbGUuY29tIiwiZXhwIjoxNTE1MjI0MDI1LCJvdHBfZGV2aWNlX2lkIjpudWxsfQ.EXAXPxI5r2RrZgroJJZdNJwtFUIOMiqmD0WxfveXo2I"}
# access an authentication-protected page
$ curl 127.0.0.1:8000/api/user/view/ -H 'Authorization: JWT eyJ0eXAiOiJKV1QiLCJhbGciOiJIUzI1NiJ9.eyJ1c2VybmFtZSI6Im1lQGV4YW1wbGUuY29tIiwiZXhwIjoxNTE1MjI0MDI1LCJvdHBfZGV2aWNlX2lkIjpudWxsfQ.EXAXPxI5r2RrZgroJJZdNJwtFUIOMiqmD0WxfveXo2I'
{"id":1,"email":"me@example.com"}
In addition, we can paste our new JWT token into the form on jwt.io to confirm that our new logic is in fact serving up the tokens. Sure enough, the header and footer are unchanged, but the payload now contains the following JSON structure:
{
  "user_id": 1,
  "username": "me@example.com",
  "exp": 1515224025,
  "otp_device_id": null
}
We’ve managed to add new information to our payload without increasing the overall size! And we’re still able to use it to log in, so we’re headed in the right direction. The remaining task is to actually populate otp_device_id once a user has verified their OTP device.
Storing An OTP Identifier in the JWT
Now we need a helper function to generate a JWT on-demand, which we can call whenever users verify their TOTP devices. This task is simplified thanks to the documentation which provides an example we can mostly cut and paste into our code with minimal modifications. We add this to otp/utils.py:
def get_custom_jwt(user, device):
    """
    Helper to generate a JWT for a validated OTP device.
    This resets the orig_iat timestamp, as we've re-validated the user.
    """
    jwt_encode_handler = api_settings.JWT_ENCODE_HANDLER

    payload = jwt_otp_payload(user, device)
    return jwt_encode_handler(payload)
Finally, we need to generate this token whenever a user authenticates their TOTP device. This requires a small enhancement to otp/views.py, using the confirmed device to generate a new OTP token. We return this token to the Single Page App once they're verified. Our code now looks as follows:
from otp.utils import get_custom_jwt


class TOTPVerifyView(views.APIView):
    """
    Use this endpoint to verify/enable a TOTP device
    """
    permission_classes = [permissions.IsAuthenticated]

    def post(self, request, token, format=None):
        user = request.user
        device = get_user_totp_device(self, user)
        if not device == None and device.verify_token(token):
            if not device.confirmed:
                device.confirmed = True
                device.save()
            token = get_custom_jwt(user, device)
            return Response({'token': token}, status=status.HTTP_201_CREATED)
        return Response(status=status.HTTP_400_BAD_REQUEST)
Now we retest, starting with a normal login, and continuing to a TOTP login. The latter used to give us a True or False, but now returns a new JWT token which our Single Page App should use going forward to prove authentication and verification.
# log in with our username and password
$ curl -X POST 127.0.0.1:8000/api/user/login/ --data 'email=me@example.com&password=mysecret'
{"token":"eyJ0eXAiOiJKV1QiLCJhbGciOiJIUzI1NiJ9.eyJ1c2VyX2lkIjoxLCJ1c2VybmFtZSI6Im1lQGV4YW1wbGUuY29tIiwiZXhwIjoxNTE1NDA1NjU0LCJvdHBfZGV2aWNlX2lkIjpudWxsfQ.r2c_3yfHCMSWGTRig1Js0Rw4I39Je2BcY8Mi5Q0OPVo"}
# second level of authentication using a TOTP device token
$ curl -X POST 127.0.0.1:8000/api/totp/login/520216/ -H 'Authorization: JWT eyJ0eXAiOiJKV1QiLCJhbGciOiJIUzI1NiJ9.eyJ1c2VyX2lkIjoxLCJ1c2VybmFtZSI6Im1lQGV4YW1wbGUuY29tIiwiZXhwIjoxNTE1NDA1NjU0LCJvdHBfZGV2aWNlX2lkIjpudWxsfQ.r2c_3yfHCMSWGTRig1Js0Rw4I39Je2BcY8Mi5Q0OPVo'
{"token":"eyJ0eXAiOiJKV1QiLCJhbGciOiJIUzI1NiJ9.eyJ1c2VyX2lkIjoxLCJ1c2VybmFtZSI6Im1lQGV4YW1wbGUuY29tIiwiZXhwIjoxNTE1NDA1NjkyLCJvdHBfZGV2aWNlX2lkIjoib3RwX3RvdHAudG90cGRldmljZS8xIn0.PbGuNCmaa5GPGgu3tsBrf64nyFFSapo98k2Hsf-89go"}
As before, we can extract the payload at jwt.io and confirm that our new JSON Web Token includes OTP verification information:
{
  "user_id": 1,
  "username": "me@example.com",
  "exp": 1515405692,
  "otp_device_id": "otp_totp.totpdevice/1"
}
Custom Permissions
Our two-factor authentication is almost working. We can authenticate and validate, but the final step is to actually make use of this information. Fortunately this is an easy step, especially if you have a general understand of Django REST Framework permissions
First, we need to create a helper that essentially replaces Django OTP’s _verify_user() function. The function accepts an http request object, extracting the JWT from the header using the JSONWebTokenAuthentication class. If existing, we’ll extract the payload from the JWT. And finally, we’ll use the otp_device_id value to determine whether or not the user has been OTP verified. We’ll put this function in our growing otp/utils.py:
from rest_framework_jwt.authentication import JSONWebTokenAuthentication
from rest_framework_jwt.utils import jwt_decode_handler

def otp_is_verified(self, request):
    """
    Helper to determine if user has verified OTP.
    """
    auth = JSONWebTokenAuthentication()
    jwt_value = auth.get_jwt_value(request)
    if jwt_value is None:
        return False

    payload = jwt_decode_handler(jwt_value)
    persistent_id = payload.get('otp_device_id')

    if persistent_id:
        device = Device.from_persistent_id(persistent_id)
        if (device is not None) and (device.user_id != request.user.id):
            return False
        else:
            # Valid device in JWT
            return True
    else:
        return False
Now, we create a new file at otp/permissions.py to add the concept of Authenticated + Verified to the REST Framework. We inherit from the framework’s BasePermission class, and provide a helpful message to anyone failing this permission check. If a user has not confirmed a TOTP device on their account, they don’t need to do anything more to prove who they are. If the user has confirmed a TOTP device on their account, they benefit from added security as they’ll need to verify their device before they can proceed.
from rest_framework import permissions
from django_otp import user_has_device
from otp.utils import otp_is_verified


class IsOtpVerified(permissions.BasePermission):
    """
    If user has verified TOTP device, require TOTP OTP.
    """
    message = "You do not have permission to perform this action until you verify your OTP device."

    def has_permission(self, request, view):
        if user_has_device(request.user):
            return otp_is_verified(self, request)
        else:
            return True
The next step is applying this new permission to all API views that we feel should require OTP verification. For this tutorial, we’ll add this new layer of protection to viewing and deleting users. We’ll essentially wrap Djoser’s UserView and UserDeleteView classes. We can inherit their functions, primarily adding to their permissions classes -- we keep the IsAuthenticated permissions, and additionally require IsOtpVerified, as otherwise an anonymous visitor could visit the page without an OTP device. We don’t bother to support Djoser’s configuration, instead grabbing the serializer directly from djoser/serializers.py. We add our new code to spauser/views.py:
from djoser.views import UserView, UserDeleteView
from djoser import serializers
from rest_framework import permissions
from spauser.models import SpaUser
from otp import permissions as otp_permissions


class SpaUserView(UserView):
    """
    Uses the default Djoser view, but add the IsOtpVerified permission.
    Use this endpoint to retrieve/update user.
    """
    model = SpaUser
    serializer_class = serializers.UserSerializer
    permission_classes = [permissions.IsAuthenticated, otp_permissions.IsOtpVerified]

class SpaUserDeleteView(UserDeleteView):
    """
    Uses the default Djoser view, but add the IsOtpVerified permission.
    Use this endpoint to remove actually authenticated user.
    """
    serializer_class = serializers.UserDeleteSerializer
    permission_classes = [permissions.IsAuthenticated, otp_permissions.IsOtpVerified]
Finally, we need to use our new view classes, instead of the default Djoser view classes. This requires changing two lines in spauser/urls.py, which will then look as follows:
from django.conf.urls import re_path
from djoser import views as djoser_views
from rest_framework_jwt import views as jwt_views
from spauser import views


urlpatterns = [
    re_path(r'^user/view/$', views.SpaUserView.as_view(), name='user-view'),
    re_path(r'^user/delete/$', views.SpaUserDeleteView.as_view(), name='user-delete'),
    re_path(r'^user/logout/all/$', views.SpaUserLogoutAllView.as_view(), name='user-logout-all'),

    # Views are defined in Djoser, but we're assigning custom paths.
    re_path(r'^user/create/$', djoser_views.UserCreateView.as_view(), name='user-create'),

    # Views are defined in Rest Framework JWT, but we're assigning custom paths.
    re_path(r'^user/login/$', jwt_views.ObtainJSONWebToken.as_view(), name='user-login'),
    re_path(r'^user/login/refresh/$', jwt_views.RefreshJSONWebToken.as_view(), name='user-login-refresh'),
]
With that, we’re ready to test and confirm it’s working as desired. Our user has a confirmed TOTP device, so they shouldn’t be able to view their user account without first verifying their device. First, let’s confirm that we’re correctly denied access to view our user object even when we’re logged in.
# log in with our username and password
$ curl -X POST 127.0.0.1:8000/api/user/login/ --data 'email=me@example.com&password=mysecret'
{"token":"eyJ0eXAiOiJKV1QiLCJhbGciOiJIUzI1NiJ9.eyJ1c2VybmFtZSI6Im1lQGV4YW1wbGUuY29tIiwiZXhwIjoxNTE1MjI5NzcwLCJvdHBfZGV2aWNlX2lkIjpudWxsfQ.d6IaLxkfjfzTb5IQexFrUQyChlCarrcJarCmlpsOh6Y"}
# we can't view our account without also verifying TOTP
$ curl -X POST 127.0.0.1:8000/api/user/view/ -H 'Authorization: JWT eyJ0eXAiOiJKV1QiLCJhbGciOiJIUzI1NiJ9.eyJ1c2VybmFtZSI6Im1lQGV4YW1wbGUuY29tIiwiZXhwIjoxNTE1MjI5NzcwLCJvdHBfZGV2aWNlX2lkIjpudWxsfQ.d6IaLxkfjfzTb5IQexFrUQyChlCarrcJarCmlpsOh6Y'
{"detail":"You do not have permission to perform this action until you verify your OTP device."}
We’re getting an HTTP 403 FORBIDDEN error, and we’re seeing our helpful error message letting us know we need to verify our OTP device. So, let’s do that. We’ll receive a new JWT which we can use to prove we’ve authenticated and verified our OTP device:
# verify our TOTP device
$ curl -X POST 127.0.0.1:8000/api/totp/login/792619/ -H 'Authorization: JWT eyJ0eXAiOiJKV1QiLCJhbGciOiJIUzI1NiJ9.eyJ1c2VybmFtZSI6Im1lQGV4YW1wbGUuY29tIiwiZXhwIjoxNTE1MjI5NzcwLCJvdHBfZGV2aWNlX2lkIjpudWxsfQ.d6IaLxkfjfzTb5IQexFrUQyChlCarrcJarCmlpsOh6Y'
{"token":"eyJ0eXAiOiJKV1QiLCJhbGciOiJIUzI1NiJ9.eyJ1c2VybmFtZSI6Im1lQGV4YW1wbGUuY29tIiwiZXhwIjoxNTE1MjI5OTk0LCJvdHBfZGV2aWNlX2lkIjoib3RwX3RvdHAudG90cGRldmljZS8xIn0.bsoHUIVmtc2PnPtJ_g4PHeE7-QcSIrei-9KzyA1EDJY"}
# view our account with the new JWT
$ curl 127.0.0.1:8000/api/user/view/ -H 'Authorization: JWT eyJ0eXAiOiJKV1QiLCJhbGciOiJIUzI1NiJ9.eyJ1c2VybmFtZSI6Im1lQGV4YW1wbGUuY29tIiwiZXhwIjoxNTE1MjI5OTk0LCJvdHBfZGV2aWNlX2lkIjoib3RwX3RvdHAudG90cGRldmljZS8xIn0.bsoHUIVmtc2PnPtJ_g4PHeE7-QcSIrei-9KzyA1EDJY'
{"id":1,"email":"me@example.com"}
Note: It’s important to see that we’re actually logging in twice in this implementation, and each time we get a different JWT. The first JWT only proves that we’re Authenticated with our email address and password. The second JWT proves that we’ve also Verified with a One Time Password. At this point, both tokens are valid, but the Single Page App can safely forget the first and exclusively use the second token. You must use the second JWT if you add a TOTP device to your account and you need to access any path protected by our new IsOtpVerified permission.
Emergency Codes
Most websites that implement TOTP two-factor authentication also provide one-time use emergency backup codes. The intent is that these codes can be used to verify your account if you lose your TOTP device. The Django OTP project provides what it calls a “Static Device" to implement this functionality.
First, we’ll add a helper to see if the user has already created a Static Device, a new function that should look rather familiar (especially as we’ll add it right after one called get_user_totp_device(). Our new function goes in otp/views.py:
from django_otp.plugins.otp_static.models import StaticDevice


def get_user_static_device(self, user, confirmed=None):
    devices = devices_for_user(user, confirmed=confirmed)
    for device in devices:
        if isinstance(device, StaticDevice):
            return device
Next, we’ll add a view class for actually creating our emergency codes. In our example, we’ll provide 6 static tokens, each of which can only be used one time to log in. Anyone that’s lost their TOTP device must disable or replace it before these tokens are used up!
If the user has already set up a static device, we delete their previous codes before creating new ones. Then, we generate 6 tokens and pass them to the Single Page App. This function also goes in otp/views.py:
from django_otp.plugins.otp_static.models import StaticToken
from otp import permissions as otp_permissions


class StaticCreateView(views.APIView):
    """
    Use this endpoint to create static recovery codes.
    """
    permission_classes = [permissions.IsAuthenticated, otp_permissions.IsOtpVerified]
    number_of_static_tokens = 6

    def get(self, request, format=None):
        device = get_user_static_device(self, request.user)
        if not device:
            device = StaticDevice.objects.create(user=request.user, name="Static")

        device.token_set.all().delete()
        tokens = []
        for n in range(self.number_of_static_tokens):
            token = StaticToken.random_token()
            device.token_set.create(token=token)
            tokens.append(token.decode('utf-8'))

        return Response(tokens, status=status.HTTP_201_CREATED)
Finally, we need a view class for validating (and consuming) tokens, logging the user in when valid. This is done by invoking the verify_token() function from the StaticDevice class. If we successfully verify the token, we create a new JWT which the Single Page App can use to prove this validation on subsequent requests, similar to proving a TOTP device:
class StaticVerifyView(views.APIView):
    """
    Use this endpoint to verify a static token.
    """
    permission_classes = [permissions.IsAuthenticated]

    def post(self, request, token, format=None):
        user = request.user
        device = get_user_static_device(self, user)
        if not device == None and device.verify_token(str.encode(token)):
            token = get_custom_jwt(user, device)
            return Response({'token': token}, status=status.HTTP_201_CREATED)
        return Response(status=status.HTTP_400_BAD_REQUEST)
With the views created, we now need to add routes. They will look quite similar to our existing TOTP routes, except static tokens are made of up of seven or eight lower case letters and numbers two through nine (we don’t use the numbers 0 or 1 so as to not confuse users with the similar looking letters o and l.) Our urlpatterns now read as follows:
urlpatterns = [
    re_path(r'^totp/create/$', views.TOTPCreateView.as_view(), name='totp-create'),
    re_path(r'^totp/login/(?P<token>[0-9]{6})/$', views.TOTPVerifyView.as_view(), name='totp-login'),
    re_path(r'^static/create/$', views.StaticCreateView.as_view(), name='static-create'),
    re_path(r'^static/login/(?P<token>[a-z2-9]{7,8})/$', views.StaticVerifyView.as_view(), name='static-login'),
]
Testing this out, we first must login with our username and password, then with our TOTP device. This finally allows us to create a static device:
# log in with our username and password
$ curl -X POST 127.0.0.1:8000/api/user/login/ --data 'email=me@example.com&password=mysecret'
{"token":"eyJ0eXAiOiJKV1QiLCJhbGciOiJIUzI1NiJ9.eyJ1c2VyX2lkIjoxLCJ1c2VybmFtZSI6Im1lQGV4YW1wbGUuY29tIiwiZXhwIjoxNTE1Mjc4MDU1LCJvdHBfZGV2aWNlX2lkIjpudWxsfQ.px9eympmS0dxmZievJcXUlM0G61cbWZyy_ei65Rl5UY"}
# verify our TOTP device, get a new JWT
$ curl -X POST 127.0.0.1:8000/api/totp/login/153877/ -H 'Authorization: JWT eyJ0eXAiOiJKV1QiLCJhbGciOiJIUzI1NiJ9.eyJ1c2VyX2lkIjoxLCJ1c2VybmFtZSI6Im1lQGV4YW1wbGUuY29tIiwiZXhwIjoxNTE1Mjc4MDU1LCJvdHBfZGV2aWNlX2lkIjpudWxsfQ.px9eympmS0dxmZievJcXUlM0G61cbWZyy_ei65Rl5UY'
{"token":"eyJ0eXAiOiJKV1QiLCJhbGciOiJIUzI1NiJ9.eyJ1c2VyX2lkIjoxLCJ1c2VybmFtZSI6Im1lQGV4YW1wbGUuY29tIiwiZXhwIjoxNTE1Mjc4MTM3LCJvdHBfZGV2aWNlX2lkIjoib3RwX3RvdHAudG90cGRldmljZS8xIn0.pz9jMLtXzAxp3-xzQ43mVo63emqamQiV8NScMOcRby0"}
# finally, use verified JWT to create emergency tokens
$ curl 127.0.0.1:8000/api/static/create/ -H 'Authorization: JWT eyJ0eXAiOiJKV1QiLCJhbGciOiJIUzI1NiJ9.eyJ1c2VyX2lkIjoxLCJ1c2VybmFtZSI6Im1lQGV4YW1wbGUuY29tIiwiZXhwIjoxNTE1Mjc4MTM3LCJvdHBfZGV2aWNlX2lkIjoib3RwX3RvdHAudG90cGRldmljZS8xIn0.pz9jMLtXzAxp3-xzQ43mVo63emqamQiV8NScMOcRby0'
["mp76f4io","5xaov5f5","p4crsviv","ezgukpcf","mygk44qr","p5t2u3r5"]
Now, we can use a static token instead of a TOTP token to get verified, as demonstrated below. We first log in with our username and password, and confirm that we’re denied access to view our user object, “You do not have permission to perform this action until you verify your OTP device." Then, we verify one of our static tokens obtained above which gives us a new JWT. We use the new token and are able to view our user object.
# log in with our username and password
$ curl -X POST 127.0.0.1:8000/api/user/login/ --data 'email=me@example.com&password=mysecret'
{"token":"eyJ0eXAiOiJKV1QiLCJhbGciOiJIUzI1NiJ9.eyJ1c2VyX2lkIjoxLCJ1c2VybmFtZSI6Im1lQGV4YW1wbGUuY29tIiwiZXhwIjoxNTE1Mjc4MzY3LCJvdHBfZGV2aWNlX2lkIjpudWxsfQ.bL6hD3_ZzU374DyFjXW6KFEU3lre-iKgZ__4h7BhAKY"}
# authentication alone is not enough to view our account
$ curl 127.0.0.1:8000/api/user/view/ -H 'Authorization: JWT eyJ0eXAiOiJKV1QiLCJhbGciOiJIUzI1NiJ9.eyJ1c2VyX2lkIjoxLCJ1c2VybmFtZSI6Im1lQGV4YW1wbGUuY29tIiwiZXhwIjoxNTE1Mjc4MzY3LCJvdHBfZGV2aWNlX2lkIjpudWxsfQ.bL6hD3_ZzU374DyFjXW6KFEU3lre-iKgZ__4h7BhAKY'
{"detail":"You do not have permission to perform this action until you verify your OTP device."}
# use a static token to verify ourselves
$ curl -X POST 127.0.0.1:8000/api/static/login/5xaov5f5/ -H 'Authorization: JWT eyJ0eXAiOiJKV1QiLCJhbGciOiJIUzI1NiJ9.eyJ1c2VyX2lkIjoxLCJ1c2VybmFtZSI6Im1lQGV4YW1wbGUuY29tIiwiZXhwIjoxNTE1Mjc4MzY3LCJvdHBfZGV2aWNlX2lkIjpudWxsfQ.bL6hD3_ZzU374DyFjXW6KFEU3lre-iKgZ__4h7BhAKY'
{"token":"eyJ0eXAiOiJKV1QiLCJhbGciOiJIUzI1NiJ9.eyJ1c2VyX2lkIjoxLCJ1c2VybmFtZSI6Im1lQGV4YW1wbGUuY29tIiwiZXhwIjoxNTE1Mjc4NDE1LCJvdHBfZGV2aWNlX2lkIjoib3RwX3N0YXRpYy5zdGF0aWNkZXZpY2UvMSJ9._AHsk3wFQ-ai00gNVVqUMLFRH54YE6ygoM_0eSRNcbA"}
# view our account with our verified token
$ curl 127.0.0.1:8000/api/user/view/ -H 'Authorization: JWT eyJ0eXAiOiJKV1QiLCJhbGciOiJIUzI1NiJ9.eyJ1c2VyX2lkIjoxLCJ1c2VybmFtZSI6Im1lQGV4YW1wbGUuY29tIiwiZXhwIjoxNTE1Mjc4NDE1LCJvdHBfZGV2aWNlX2lkIjoib3RwX3N0YXRpYy5zdGF0aWNkZXZpY2UvMSJ9._AHsk3wFQ-ai00gNVVqUMLFRH54YE6ygoM_0eSRNcbA'
{"id":1,"email":"me@example.com"}
We can also decode the payload of our JWT, confirming that we logged in with a Static Device instead of with a TOTP device:
{
  "user_id": 1,
  "username": "me@example.com",
  "exp": 1515278415,
  "otp_device_id": "otp_static.staticdevice/1"
}
Deleting Devices
The last piece of functionality we’re going to add is a way to delete registered devices. For example, if you lose your TOTP device, you should be able to log in with a static emergency code, de-register your old device, and add a new one.
The function requires that the user has first verified with their TOTP device (or a static emergency code). Then, it deletes any TOTP and Static devices the user has created. Finally, it creates a new secret key for the user and generates a new JWT token. While we don't strictly need to invalidate old tokens, it feels more logical to force people to re-login and use new tokens. At this point, only the new token that was returned provides access to the API.
import uuid


class TOTPDeleteView(views.APIView):
    """
    Use this endpoint to delete a TOTP device
    """
    permission_classes = [permissions.IsAuthenticated, otp_permissions.IsOtpVerified]

    def post(self, request, format=None):
        user = request.user
        devices = devices_for_user(user)
        for device in devices:
            device.delete()
        user.jwt_secret = uuid.uuid4()
        user.save()
        token = get_custom_jwt(user, None)
        return Response({'token': token}, status=status.HTTP_200_OK)
Next we need to wire it up, adding a route in urlpatterns in otp/urls.py:
re_path(r'^totp/delete/$', views.TOTPDeleteView.as_view(), name='totp-delete'),
Finally, let’s test it out. We’ll log in, then verify ourselves with one of the static codes we generated earlier.
# log in with our username/password
$ curl -X POST 127.0.0.1:8000/api/user/login/ --data 'email=me@example.com&password=mysecret'
{"token":"eyJ0eXAiOiJKV1QiLCJhbGciOiJIUzI1NiJ9.eyJ1c2VyX2lkIjoxLCJ1c2VybmFtZSI6Im1lQGV4YW1wbGUuY29tIiwiZXhwIjoxNTE1MzEwOTg4LCJvdHBfZGV2aWNlX2lkIjpudWxsfQ.y5SmmgEwfxGPvGFcKSSyEWU9PcjGlK311KAiFtZm4t8"}
# verify ourselves with a static token
$ curl -X POST 127.0.0.1:8000/api/static/login/ezgukpcf/ -H 'Authorization: JWT eyJ0eXAiOiJKV1QiLCJhbGciOiJIUzI1NiJ9.eyJ1c2VyX2lkIjoxLCJ1c2VybmFtZSI6Im1lQGV4YW1wbGUuY29tIiwiZXhwIjoxNTE1MzEwOTg4LCJvdHBfZGV2aWNlX2lkIjpudWxsfQ.y5SmmgEwfxGPvGFcKSSyEWU9PcjGlK311KAiFtZm4t8'
{"token":"eyJ0eXAiOiJKV1QiLCJhbGciOiJIUzI1NiJ9.eyJ1c2VyX2lkIjoxLCJ1c2VybmFtZSI6Im1lQGV4YW1wbGUuY29tIiwiZXhwIjoxNTE1MzExMDMzLCJvdHBfZGV2aWNlX2lkIjoib3RwX3N0YXRpYy5zdGF0aWNkZXZpY2UvMSJ9.hfNKuep0ipTRT04Ky5pOU9dx-gB555Atzl__MHcr3Vk"}
# confirm we can access the user object
$ curl 127.0.0.1:8000/api/user/view/ -H 'Authorization: JWT eyJ0eXAiOiJKV1QiLCJhbGciOiJIUzI1NiJ9.eyJ1c2VyX2lkIjoxLCJ1c2VybmFtZSI6Im1lQGV4YW1wbGUuY29tIiwiZXhwIjoxNTE1MzExMDMzLCJvdHBfZGV2aWNlX2lkIjoib3RwX3N0YXRpYy5zdGF0aWNkZXZpY2UvMSJ9.hfNKuep0ipTRT04Ky5pOU9dx-gB555Atzl__MHcr3Vk'
{"id":1,"email":"me@example.com"}
# delete our TOTP (and static) devices
$ curl -X POST 127.0.0.1:8000/api/totp/delete/ -H 'Authorization: JWT eyJ0eXAiOiJKV1QiLCJhbGciOiJIUzI1NiJ9.eyJ1c2VyX2lkIjoxLCJ1c2VybmFtZSI6Im1lQGV4YW1wbGUuY29tIiwiZXhwIjoxNTE1MzExMDMzLCJvdHBfZGV2aWNlX2lkIjoib3RwX3N0YXRpYy5zdGF0aWNkZXZpY2UvMSJ9.hfNKuep0ipTRT04Ky5pOU9dx-gB555Atzl__MHcr3Vk'
{"token":"eyJ0eXAiOiJKV1QiLCJhbGciOiJIUzI1NiJ9.eyJ1c2VyX2lkIjoxLCJ1c2VybmFtZSI6Im1lQGV4YW1wbGUuY29tIiwiZXhwIjoxNTE1MzExMTgzLCJvdHBfZGV2aWNlX2lkIjpudWxsfQ.AIBt-KaPsJ12269jKf4ZAOQla80_hxSG_J1BT51soSY"}
# we can now access the user object with an unverified log in
$ curl 127.0.0.1:8000/api/user/view/ -H 'Authorization: JWT eyJ0eXAiOiJKV1QiLCJhbGciOiJIUzI1NiJ9.eyJ1c2VyX2lkIjoxLCJ1c2VybmFtZSI6Im1lQGV4YW1wbGUuY29tIiwiZXhwIjoxNTE1MzExMTgzLCJvdHBfZGV2aWNlX2lkIjpudWxsfQ.AIBt-KaPsJ12269jKf4ZAOQla80_hxSG_J1BT51soSY'
{"id":1,"email":"me@example.com"}
{
  "user_id": 1,
  "username": "me@example.com",
  "exp": 1515311183,
  "otp_device_id": null
}
Note: There are more Django REST Framework JWT configuration options available, documented here. In particular, you may want to enable JWT_ALLOW_REFRESH. If you do, you'll also need to override RefreshJSONWebTokenSerializer to properly retain our new otp_device_id value on update, or your users will lose their OTP verification status on token renews.
Need to build an API?
We can help you architect and implement a winning solution.
Conclusion
We now have a very functional API providing basic user registration and login management. It also fully supports two-factor authentication through TOTP devices, including emergency codes for when users lose their devices. This required learning more about JSON Web Tokens and building our own custom payload to track whether or not a user has verified possession of their one-time password device. You can find all the code used in this blog at GitHub.
There's enough complexity in what we've built, if we change anything or add any new features it's a lot of work to manually test all functionality and make sure we didn't break anything. As this API is all about managing who can and who can not access our website, it's critically important it works correctly! In the next blog in this series, we'll introduce unit testing, giving us much more confidence that things work how we expect them to. As we add or change code in the future, these tests will help us to quickly detect and fix any bugs we may accidentally introduce.
- Part I: Powering A Single Page App
- Part II: One-Time Passwords
- Part III: Unit Testing (Coming Soon)